
10 Things I Do on Every New Xcode Installation
…and a welcome to the first edition of YV Insights.


A fresh Xcode install looks harmless.
But if you’ve been in the iOS game for a while, you know better—because nothing ages a developer faster than “No signing certificate ‘iOS Distribution’ found” on a release day combined with “where did all my hotkeys go??”.
I’ll spare you the history of Project Builder, and the fact that Xcode is a creaky, decades-deep codebase. The numbers back it up: you have to have a Mac and an Xcode toolchain as your primary IDE. Even though 95% of us are using Xcode as our main toolchain, the day you augment it with VS Code or Cursor is the day you realize you merely tolerated the default IDE Apple ships the mandatory stuff with.
The bottom line is: Xcode is just not pleasant to work with, and it never quite has been.
So this is the part where every micro-adjustment will make your life slightly better every time—and it compounds fast if you’re working on a moderately serious app or using a modern agent-assisted flow.
The Tough Part
If the Agentic AI hype wave taught you one thing, it’s that nobody can reliably predict what ships next month, let alone next decade.
This goes double for Xcode and Mobile development in general. There’s a real chance that tomorrow will bring web-based applets à la App Clips or Apple Glasses that compete with Meta’s Ray-Bans. Apple keeps quietly prototyping.
So I’ve written this list to be evergreen to the highest extent possible. If you’re reading this 10 years from now, unless Apple retires Xcode and does a full bottom-up rewrite, very few things here will be outdated. And judging by how the industry treats rewrites, where the canonical advice is literally “never rewrite from scratch”, plus Xcode’s own NeXT-era lineage, I would not hold my breath.
Light spoiler: Number 4 has been a game changer for me since 2019, and #5 has existed for over a decade now. Never went stale, never got retired by Claude Code, never went the way of Xcode Plugins.
Let’s dive in.
1. Install Xcodes to manage Xcode versions

A screenshot of Xcodes (source: GitHub)
If you miss using JetBrains Toolbox—this one is for you.
Xcodes exists for one specific pain point: installing and switching between multiple Xcode versions without manually juggling giant app bundles. The official Homebrew formula gives you—and your favorite AI Agent—a command-line tool to install and switch between multiple versions of Xcode, while harnessing Apple’s own xcode-select tool—the latter only controls which already-installed developer directory is active for tools like xcodebuild, xcrun, and cc. It tells your system “hey, switch between different Xcode installations that I have on my machine”.
In a Beta season, if your next task is “ensure iOS Beta builds don’t break while you still need the latest stable version of iOS for maintenance work”, Apple’s answer is “use https://developer.apple.com/download/”.
When a “minor” Xcode upgrade breaks your CI pipeline, Apple’s answer is “well, have you tried Xcode Cloud?”.
Xcodes is that switch + downloader + version browser—all the way down to Xcode 1.0. (Which you can’t run on a modern Apple Silicon machine. Sorry, no nostalgia Rabbit Hole this time.)
2. Enable “Show whitespaces and newlines”
The Xcode editor with invisible characters enabled
You can’t fix what you can’t see. By default Xcode hides every space, tab, and newline—which is how you end up with a diff that’s 40 “changed” lines and 39 of them are nothingness that you didn’t even touch.
Turn it on under Editor > Invisibles (recent Xcode also exposes it in Settings > Text Editing > Display). Spaces, tabs, and line endings become visible, so you catch a stray tab in a spaces file—or trailing junk—before it reaches the PR.
It looks noisy for a day. Then your brain filters the dots out and you never go back after noticing how tidy it makes your code look.
Pairs directly with the next one…
3. Disable “Leave whitespaces-only lines intact”
A stray whitespace-only line has entered your git diff.
Your “empty” lines still carry four spaces of invisible cruft that light up every diff.
It looks untidy, chaotic, and outright sloppy.
Now that you can see the whitespace, stop shipping it.
In Settings > Text Editing > Editing, turn on “Automatically trim trailing whitespace” and—crucially—its sub-option “Including whitespace-only lines”.
Prefer to script your machine setup? Execute these in your Terminal: defaults write com.apple.dt.Xcode DVTTextEditorTrimTrailingWhitespace -bool true and defaults write com.apple.dt.Xcode DVTTextEditorTrimWhitespaceOnlyLines -bool true. One shell script to solve both.
One known gap: blank lines inside multiline comments still don’t get trimmed.
…but the next tool catches the rest.
4. Install SwiftLint
Watch your language!
The one tool on this list I’ve run on every project since 2019.
SwiftLint enforces Swift style and conventions so code review stops being an argument about brace placement and goes back to being about logic.
brew install swiftlint, then add a Run Script build phase after Compile Sources.
That said, if you are using Homebrew, make sure you set ENABLE_USER_SCRIPT_SANDBOXING to NO, as its default YES value will block custom script execution since Xcode 15 (2023); add /opt/homebrew/bin to your PATH as well.
Drop a .swiftlint.yml at the repo root to pick your rules, and run swiftlint --fix && swiftlint if you want auto-correct plus warnings on the rest.
It’s scriptable and works great with Codex and Claude—ask your agent to do the setup for you, then watch the runtime do style policing for both manually- and automatically-generated code. (Hint: couple it with GitHub Actions, Xcode Cloud, or other CI of your choice—setup takes 2 minutes, zero API keys, and negligible compute time.)

Apple finally bundled swift-format into Xcode 16 (2024), which is nice—but SwiftLint had a six-year head start and a far deeper rule set.
5. Use Xcode templates aggressively
“This is the 200th time I’m creating an app with my preferred architecture. claude please fix”
The feature that’s been in Xcode for over a decade and almost nobody seemed to customize.
Every team has a “new screen” shape: a view, a view model, a TCA stack, a coordinator, a set of tests—all wired together. Rebuilding that by hand every time is how you introduce typos, half-missing boilerplate, and AI hallucinations.
It’s abstracted away from Xcode’s UI and has a hidden—almost undocumented—scripting language. In fact, the only properly documented articles I found online are reverse engineered over years of trial-and-error—either from GitHub OSS projects, or published on software agency blogs. But in this day and age, if you can now harness it by asking Claude or Codex to save yourself hours of unpaid labor, what’s stopping you?
Custom file templates live in ~/Library/Developer/Xcode/Templates/File Templates/ (create it—it does not exist by default). Each one is a .xctemplate folder with a TemplateInfo.plist and a base file. Name the base file ___FILEBASENAME___.swift and Xcode substitutes whatever name the developer types in the New File dialog.
Once your module template exists, “new feature” is a ten-second File > New—instead of a ten-minute ritual you will inevitably get wrong. Focus that energy on building business logic instead.
6. Enable the build performance benchmarks

Here’s a retro throwback screenshot for you. iOS programming has changed a lot since “CompileXIB” was a common build step, but the point still stands.
You can’t optimize a build time you never measure.
Apple’s answer to slow builds is “buy another MacBook”.
That works… up to a point where you’re optimizing CI time, or just trying to build more and live life instead of waiting for “Build Failed”.
When you realize how much of a sinkhole some Xcode builds become, you’ll be shocked. Talk about screen time!
First, surface the number of seconds it took you to build your Xcode project: defaults write com.apple.dt.Xcode ShowBuildOperationDuration -bool YES, then restart Xcode. The actual build duration now sits next to “Build Succeeded” in the toolbar, so every build tells you what it cost.
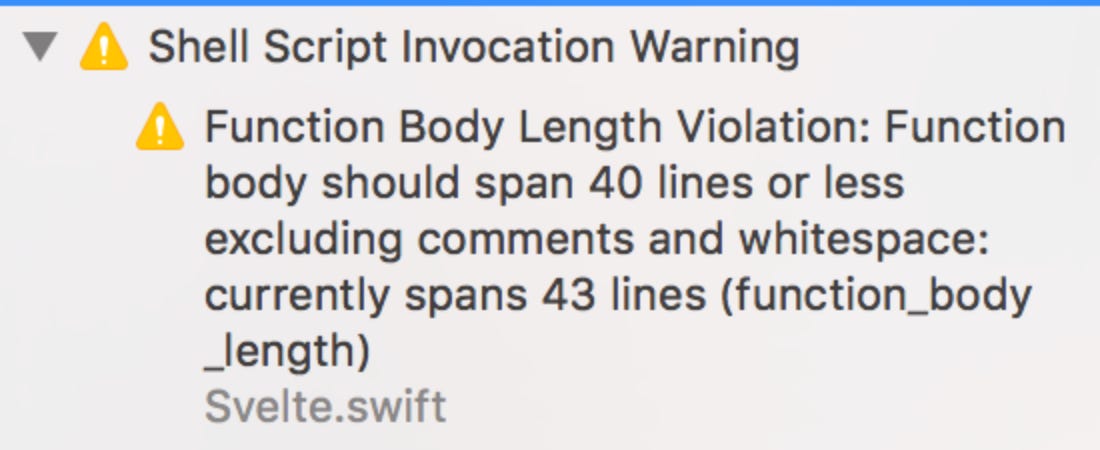
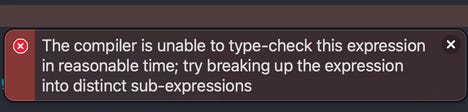
Second, find the “The compiler is unable to type-check this expression” culprits.
In Build Settings > Other Swift Flags, add -Xfrontend -warn-long-function-bodies=100 -Xfrontend -warn-long-expression-type-checking=100. Xcode then warns on any function or expression that takes over 100ms to type-check.
Which is almost always a sign of a SwiftUI body doing far too much, or a cursed line of chained operators, RxSwift-style.
“how to scare an ios developer”
7. Disable the crash reporter modals

“Xcode quit unexpectedly”
Nothing breaks flow like a modal you have to dismiss.
When you’re chasing a crash loop, macOS throws its “application quit unexpectedly” dialog every single time—stealing focus, stacking up, demanding a click before you can get back to work.
We will likely never achieve crash-free Xcode… or crash-free Apple apps, in general. But you can still cope with “quit unexpectedly” modals without having to retire from your work. (Yep, no need to retrain as a plumber.)
defaults write com.apple.CrashReporter DialogType none makes it stop and write the report to a log instead.
Put it back with defaults write com.apple.CrashReporter DialogType crashreport when you want the dialog again.
Or, swap the modal with a nonintrusive Notification Center message instead: defaults write com.apple.CrashReporter UseUNC -bool YES

Honest caveat: this is system-wide, not Xcode-only. You’re silencing the crash dialog for every app and giving up the instant “Report to Apple” prompt. For a dedicated dev machine it’s an easy yes; on a Mac you also use for normal work—think twice.
8. Enable the spell checker
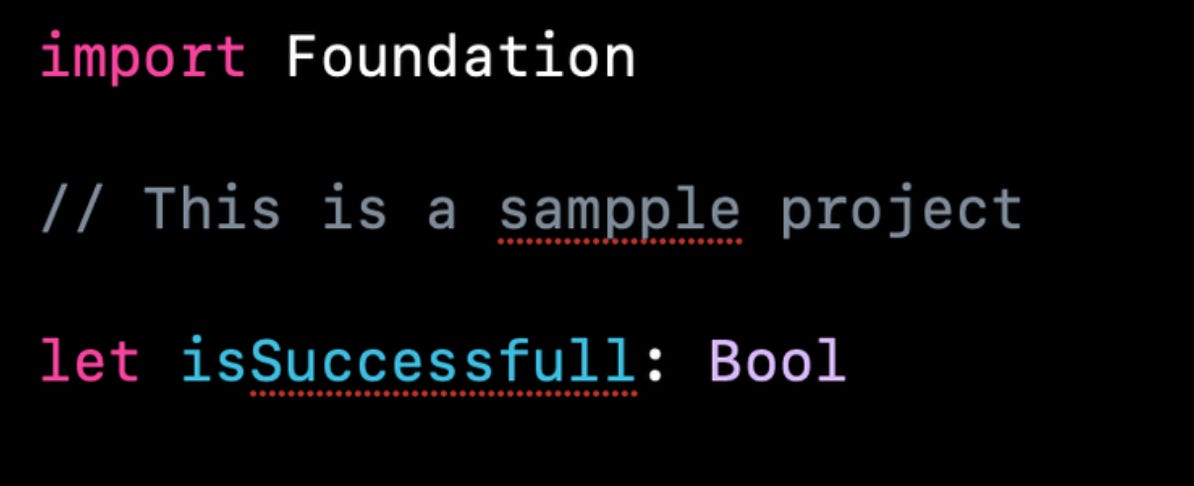
Image credit: Vincent Pradeilles
The compiler checks your syntax. Nothing checks your spelling.
Spelling bugs are the worst kind. Because they compile.
Turn on Edit > Format > Spelling and Grammar > Check Spelling While Typing. macOS then underlines typos in your identifiers, comments, and string literals. That matters more than it sounds: a misspelled dictionary key, a typo’d analytics event name, or a public method called intialize builds perfectly and ships straight to production—where someone finds it 18 months later.
It is free, it is built in, and it has been sitting in that menu the entire time.
9. Anthropic and OpenAI integrations
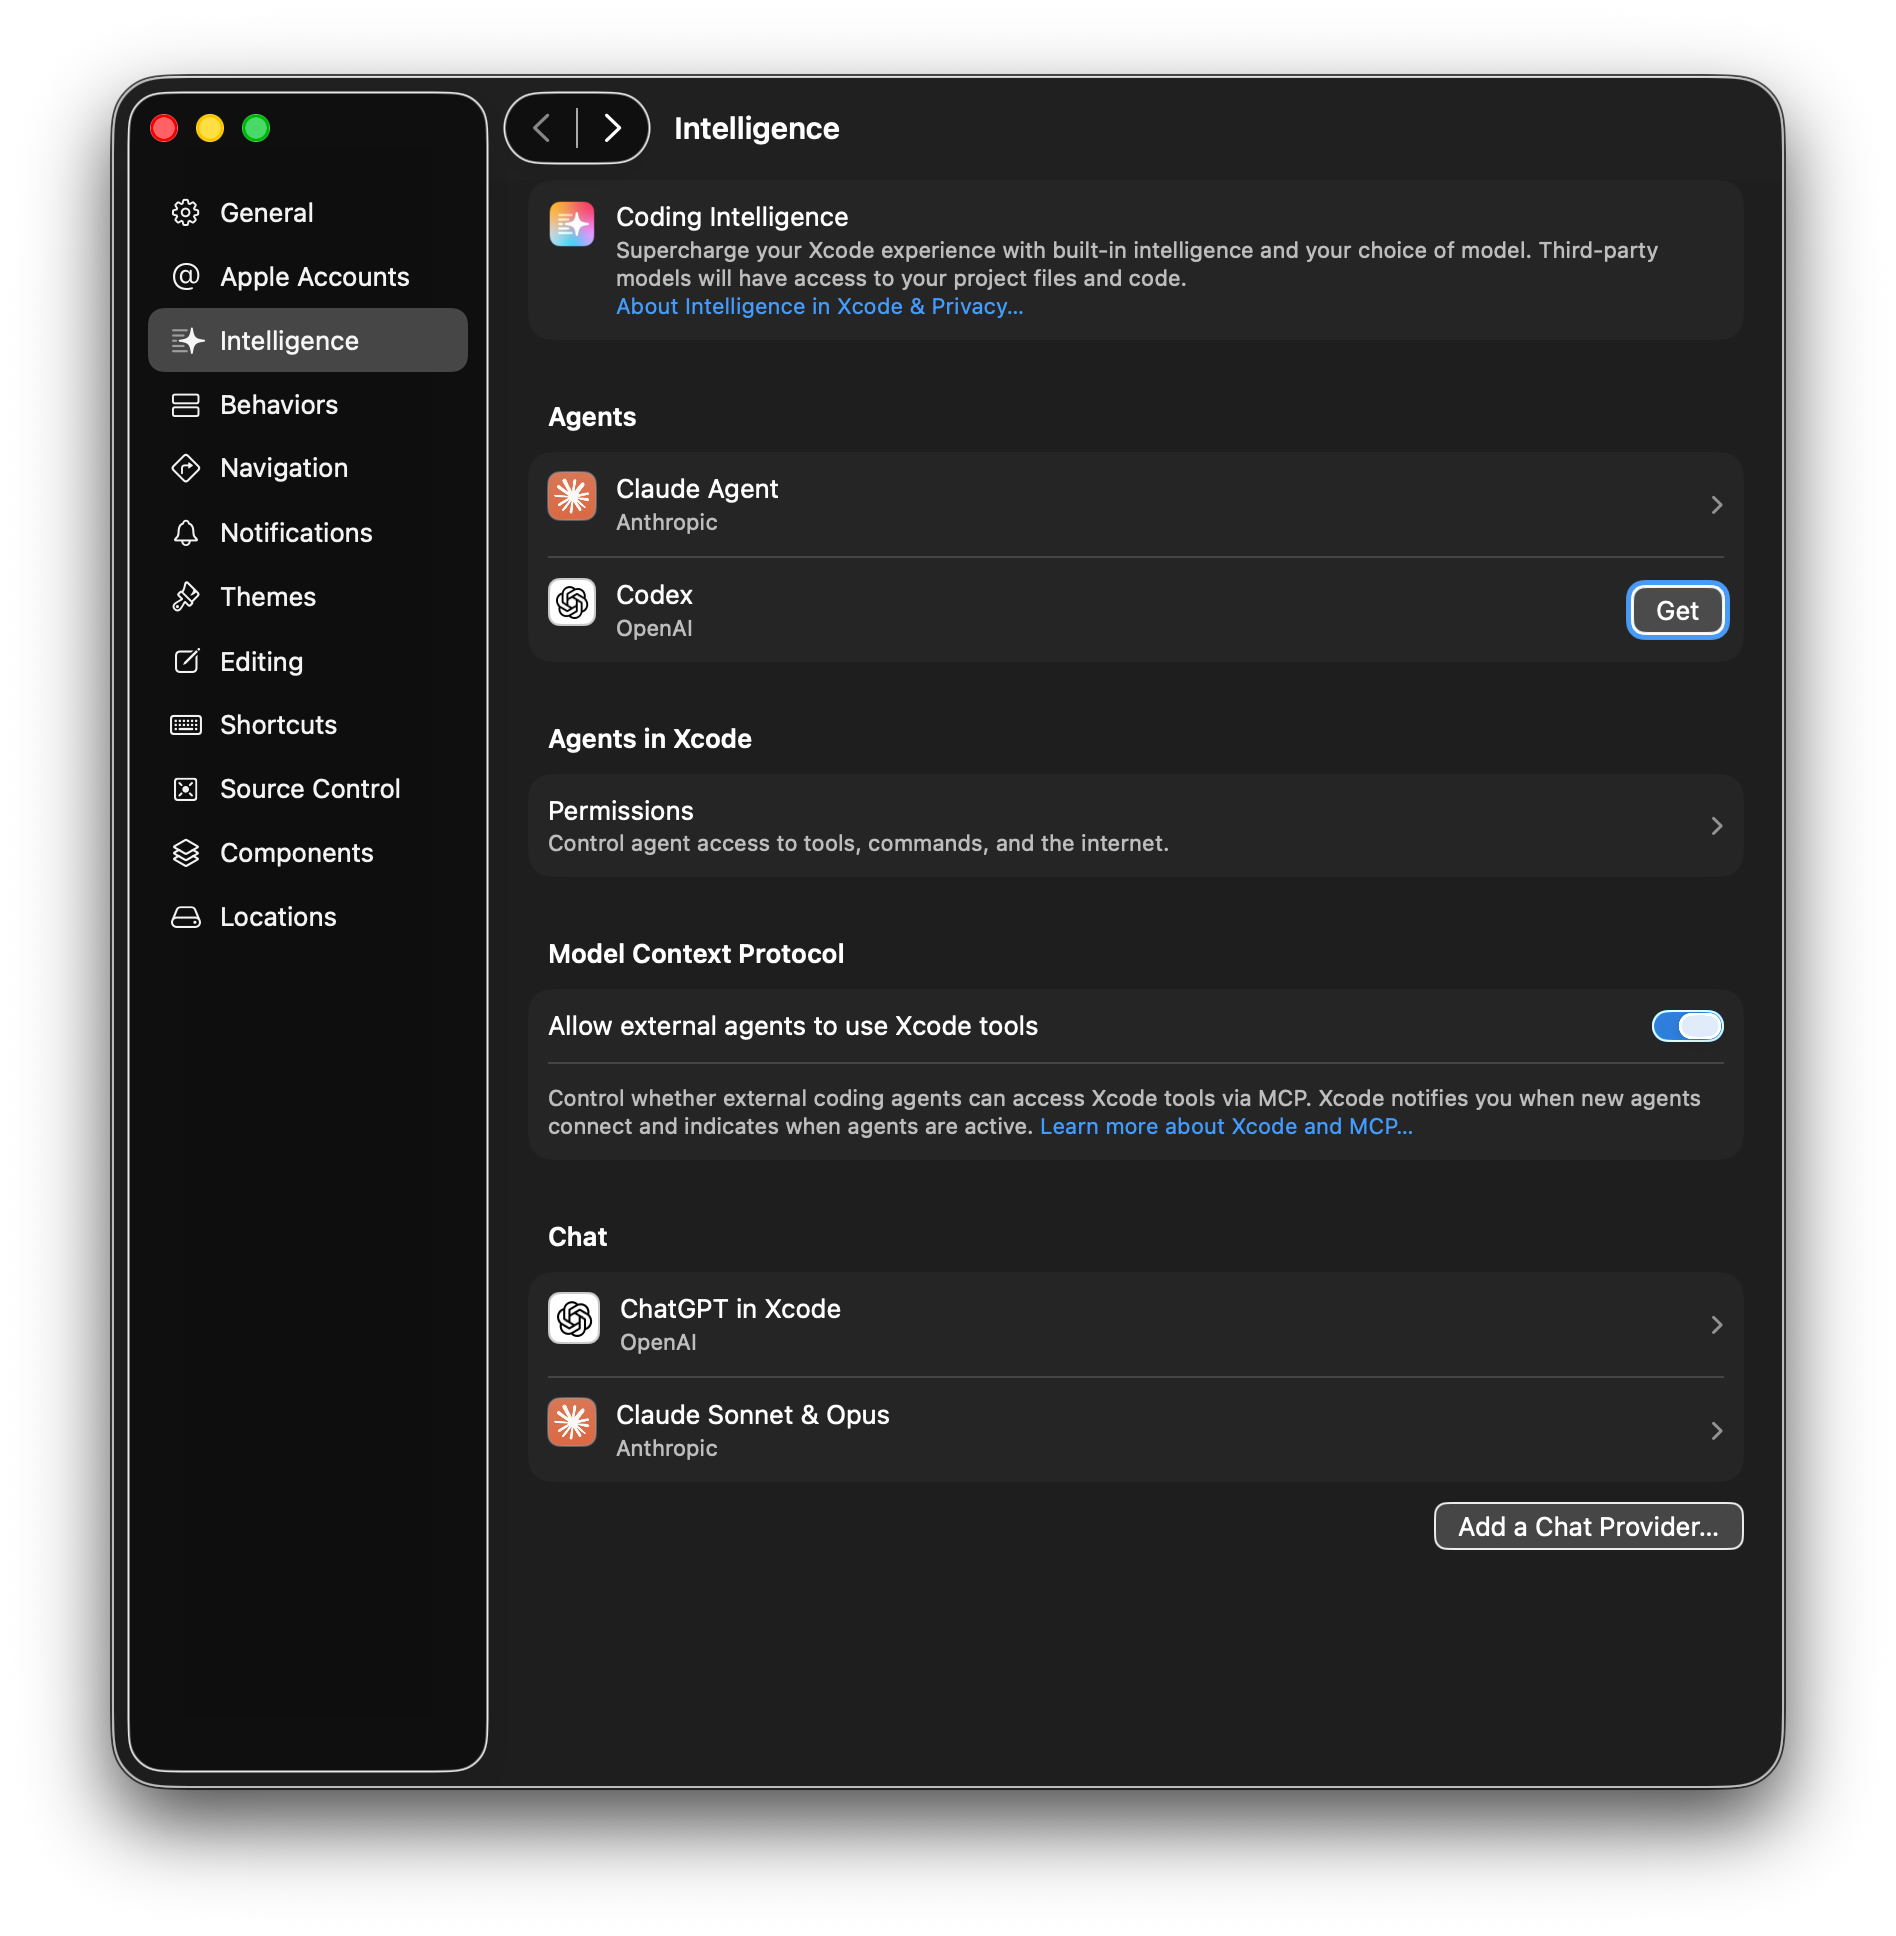
Now you can ask Claude and Codex to “make no mistakes” without Cmd-tabbing.
The entry that did not exist two years ago.
Xcode 26 added Coding Intelligence with pluggable model providers—so the AI assistant is no longer a glorified autocomplete that’s somehow worse than GitHub Copilot in its heyday.
Open Settings > Intelligence. ChatGPT is built in: click Get in the Codex row to use it with a ChatGPT account. For Claude, either sign in with your Anthropic account or choose Add a Model Provider, enter https://api.anthropic.com/ and an API key from console.anthropic.com. Apple wired in the full Claude Agent SDK, so Claude runs as an autonomous agent inside the IDE—not just inline completion.
See Apple’s own setup docs for the full Rabbit Hole.
For a company that spent years insisting on-device-or-nothing and a set of mid-2020s Apple Intelligence fiascos, shipping a settings panel whose entire job is to pipe your code to OpenAI and Anthropic is quite a welcome pivot.
10. Use xcconfigs

These little guys.
The .xcodeproj is where merge conflicts go to ruin your afternoon. Build settings live inside the project’s pbxproj by default—a format that is technically XML-ish and practically unreadable, and merge-hostile on top of that.
xcconfig files pull those settings out into plain text you can read, diff, and review like real code. One file per environment (Debug, Release, Staging), shared values in a base file—and your configuration stops being something you have to reverse-engineer deliberately.
Two rules: never add a .xcconfig to a target or to Copy Bundle Resources (that is, it must not end up in your .ipa), and migrate common settings one-by-one, since you can copy any setting’s resolved value straight from the Build Settings inspector.
This is the one that scales. On a solo toy app, you maybe won’t miss it. On a moderately serious app with three environments and a team of developers larger than one, a set of .xcconfigs becomes the difference between clean, flowing work… and a 600-line pbxproj merge conflict.
Summary
“People ask if Siri is finally smart now. And I say: she’s renting a brain from Google. It’s gonna be great.”
— Craig Federighi (source: i made it up)
As I’m writing this, WWDC26—and, with it, Xcode 27—are on the way.
Which means a fresh batch of new APIs piled on top of the old ones Apple still hasn’t finished burying. (Carbon took until macOS Catalina to fully die. Until you grep your system and find its leftovers still there. Go figure.)
In this first edition of YV Insights, you’re getting a bite-sized version of how I work at yuryv.info and my Tech, Mobile, and Biz day-to-day. There’s a lot more coming, and this newsletter is where it lands first.
So subscribe now, and you’ll discover how Apple will actually utilize Apple Intelligence in its Google Gemini-powered “comeback” move, and which parts of your future dev workflow are still Project Builder under the hood.
You’ll also get what’s genuinely new in Xcode 27, what breaks once Rosetta 2 is out of the game, and the, uh, insights your Project Manager is bothering you to dig for.
And one day, I’ll give one VIP Rabbit a free taco. So buy fast.

Welcome to the Rabbit Hole.